Installing chimney flashing with roof tiles is a crucial process that ensures the integrity and longevity of your roof. As a roof tile supplier, I've witnessed firsthand the importance of proper installation to prevent water leaks and structural damage. In this blog, I'll guide you through the step-by-step process of installing chimney flashing with roof tiles, providing you with the knowledge and confidence to tackle this project successfully.
Understanding Chimney Flashing
Chimney flashing is a thin, waterproof material installed around the base of a chimney to prevent water from seeping into the roof and causing damage. It acts as a barrier, redirecting water away from the chimney and onto the roof tiles. There are several types of chimney flashing available, including step flashing, counter flashing, and cricket flashing. Each type serves a specific purpose and is designed to work in conjunction with the roof tiles to provide maximum protection.
Step 1: Gather the Necessary Tools and Materials
Before you begin the installation process, it's important to gather all the necessary tools and materials. Here's a list of items you'll need:
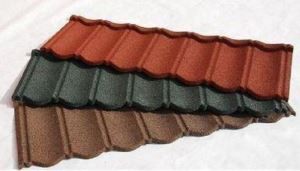
- Roof tiles: Choose high-quality roof tiles that are compatible with your chimney flashing. Steel Roofing Sheets, Corrugated Metal Roofing Sheet, and Coated Metal Roofing Sheets are popular options that offer durability and protection.
- Chimney flashing: Select the appropriate type of chimney flashing based on your roof design and chimney configuration. Step flashing is commonly used for vertical chimney walls, while counter flashing is used for the top of the chimney.
- Sealant: Use a high-quality sealant to ensure a watertight seal between the chimney flashing and the roof tiles.
- Screwdriver or drill: You'll need a screwdriver or drill to secure the chimney flashing to the roof.
- Tin snips: Tin snips are used to cut the chimney flashing to the appropriate size and shape.
- Measuring tape: A measuring tape is essential for accurately measuring the dimensions of the chimney and the roof tiles.
- Safety equipment: Don't forget to wear safety equipment, such as gloves, goggles, and a hard hat, to protect yourself during the installation process.
Step 2: Prepare the Roof and Chimney
Before installing the chimney flashing, it's important to prepare the roof and chimney. Start by removing any existing roof tiles or flashing that may be in the way. Use a pry bar or a roofing shovel to carefully remove the tiles, taking care not to damage them. Once the tiles are removed, clean the surface of the roof and the chimney to remove any dirt, debris, or old sealant.
Next, measure the dimensions of the chimney and the roof tiles to determine the size and shape of the chimney flashing. Use a measuring tape to measure the height and width of the chimney, as well as the length and width of the roof tiles. Transfer these measurements to the chimney flashing and use tin snips to cut the flashing to the appropriate size and shape.
Step 3: Install the Step Flashing
Step flashing is typically installed first, starting at the bottom of the chimney and working your way up. Begin by applying a bead of sealant to the back of the first piece of step flashing. Place the flashing against the chimney wall, aligning it with the edge of the roof tile. Use a screwdriver or drill to secure the flashing to the roof, making sure to drive the screws through the pre-drilled holes in the flashing and into the roof deck.
Continue installing the step flashing, overlapping each piece by at least 2 inches. Make sure to bend the flashing at a 90-degree angle to fit around the chimney corner. Apply a bead of sealant to the overlapping edges of the flashing to ensure a watertight seal.
Step 4: Install the Counter Flashing
Once the step flashing is installed, it's time to install the counter flashing. Counter flashing is typically installed on top of the chimney, covering the step flashing and providing an additional layer of protection. Start by applying a bead of sealant to the back of the counter flashing. Place the flashing against the chimney wall, aligning it with the top of the step flashing. Use a screwdriver or drill to secure the flashing to the chimney, making sure to drive the screws through the pre-drilled holes in the flashing and into the chimney masonry.
Continue installing the counter flashing, overlapping each piece by at least 2 inches. Make sure to bend the flashing at a 90-degree angle to fit around the chimney corner. Apply a bead of sealant to the overlapping edges of the flashing to ensure a watertight seal.
Step 5: Install the Cricket Flashing (if necessary)
If your chimney has a steep pitch or a large surface area, you may need to install cricket flashing. Cricket flashing is a triangular-shaped piece of flashing that is installed on the backside of the chimney to prevent water from pooling and causing damage. To install the cricket flashing, start by measuring the dimensions of the chimney and the roof tiles to determine the size and shape of the cricket. Use a measuring tape to measure the height and width of the chimney, as well as the length and width of the roof tiles. Transfer these measurements to the cricket flashing and use tin snips to cut the flashing to the appropriate size and shape.
Next, apply a bead of sealant to the back of the cricket flashing. Place the flashing against the chimney wall, aligning it with the edge of the roof tile. Use a screwdriver or drill to secure the flashing to the roof, making sure to drive the screws through the pre-drilled holes in the flashing and into the roof deck.
Step 6: Reinstall the Roof Tiles
Once the chimney flashing is installed, it's time to reinstall the roof tiles. Start by applying a bead of sealant to the back of the first roof tile. Place the tile on the roof, aligning it with the edge of the chimney flashing. Use a roofing nailer or a hammer and nails to secure the tile to the roof, making sure to drive the nails through the pre-drilled holes in the tile and into the roof deck.
Continue reinstalling the roof tiles, overlapping each tile by at least 2 inches. Make sure to cut the tiles to fit around the chimney flashing, using a tile cutter or a wet saw. Apply a bead of sealant to the overlapping edges of the tiles to ensure a watertight seal.


Step 7: Seal the Edges and Joints
After reinstalling the roof tiles, it's important to seal the edges and joints to prevent water from seeping in. Use a high-quality sealant to seal the edges of the chimney flashing, as well as the joints between the roof tiles. Apply the sealant generously, making sure to fill any gaps or cracks.
Step 8: Inspect the Installation
Once the installation is complete, it's important to inspect the chimney flashing and the roof tiles to ensure that everything is installed correctly. Check for any gaps, cracks, or loose connections in the flashing and the tiles. Make sure that the sealant is properly applied and that there are no signs of water leakage.
If you notice any issues or problems during the inspection, make the necessary repairs or adjustments immediately. It's better to address these issues early on to prevent more serious damage from occurring.
Conclusion
Installing chimney flashing with roof tiles is a complex process that requires careful planning and attention to detail. By following the steps outlined in this blog, you can ensure that your chimney flashing is installed correctly and that your roof is protected from water damage. Remember to choose high-quality roof tiles and chimney flashing, and to use a high-quality sealant to ensure a watertight seal. If you have any questions or need further assistance, don't hesitate to contact us. We're here to help you with all your roofing needs.
References
- "Roofing Installation Guide." National Roofing Contractors Association.
- "Chimney Flashing Installation." International Association of Certified Home Inspectors.
- "How to Install Chimney Flashing." This Old House.